Fretless Bass

Handmade by Jon Palmer, September-October 2007

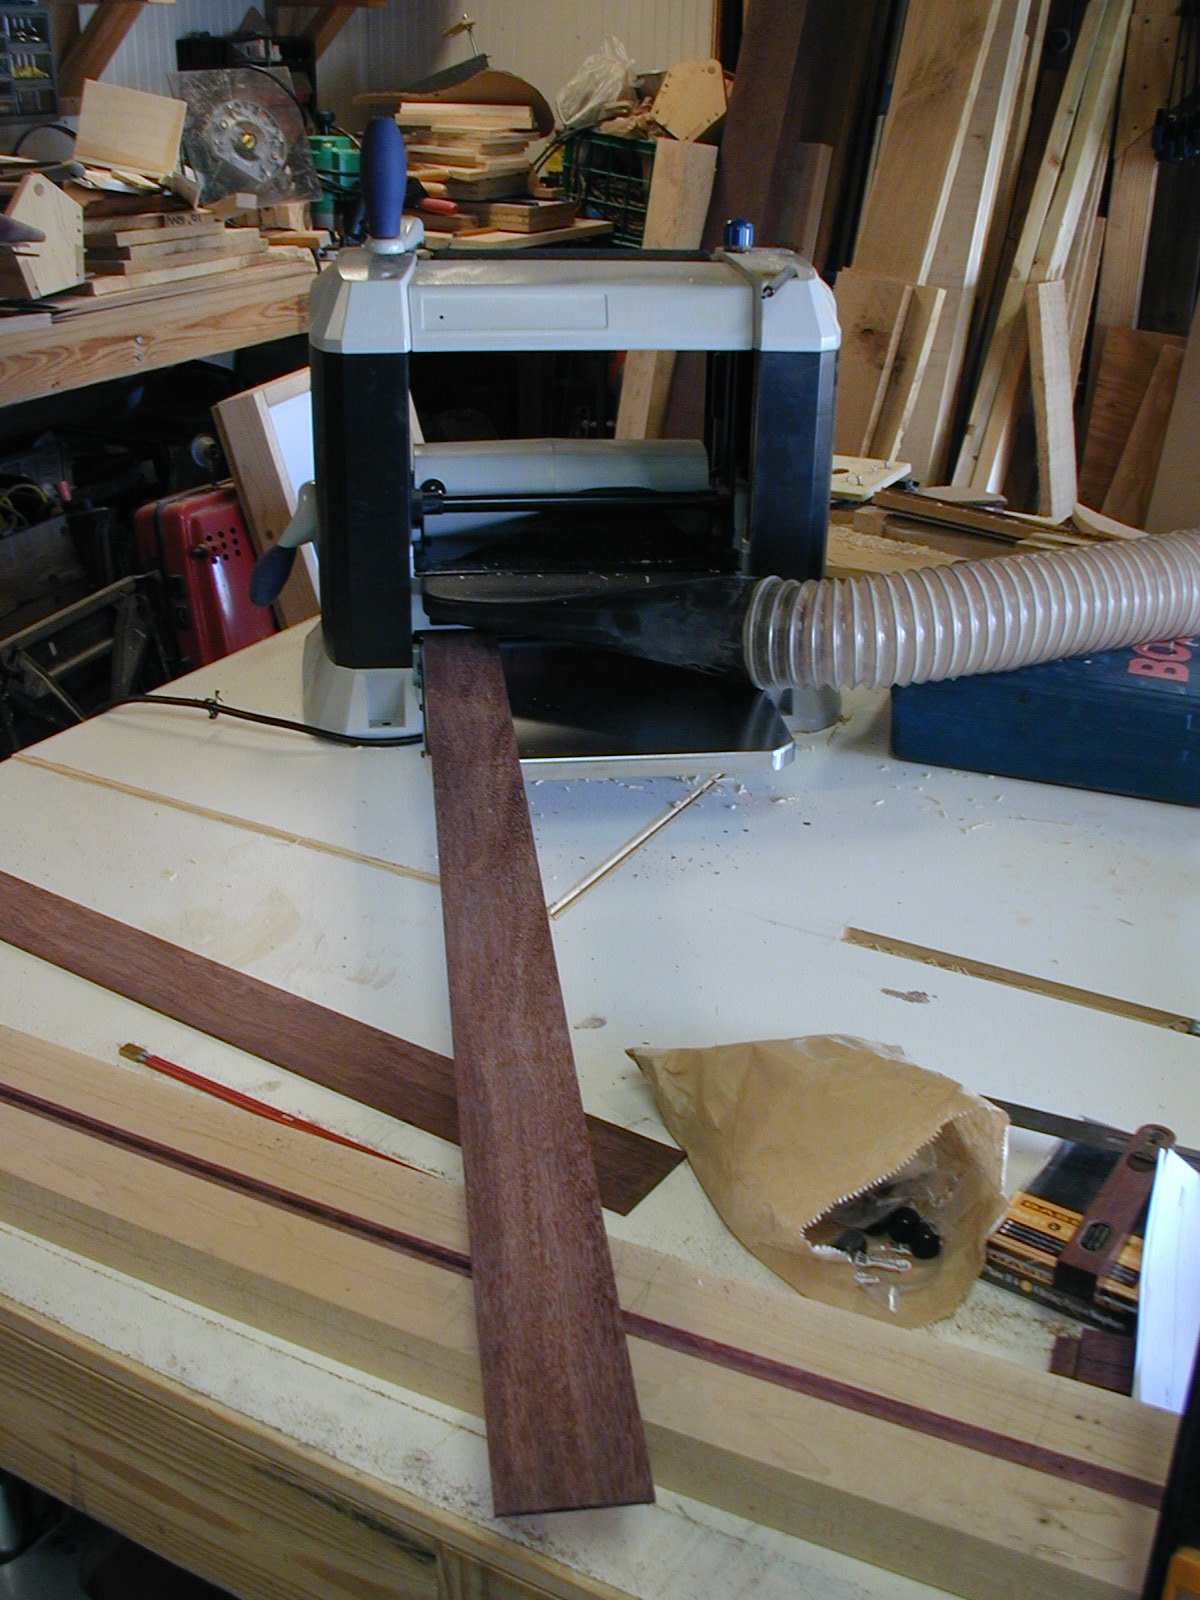
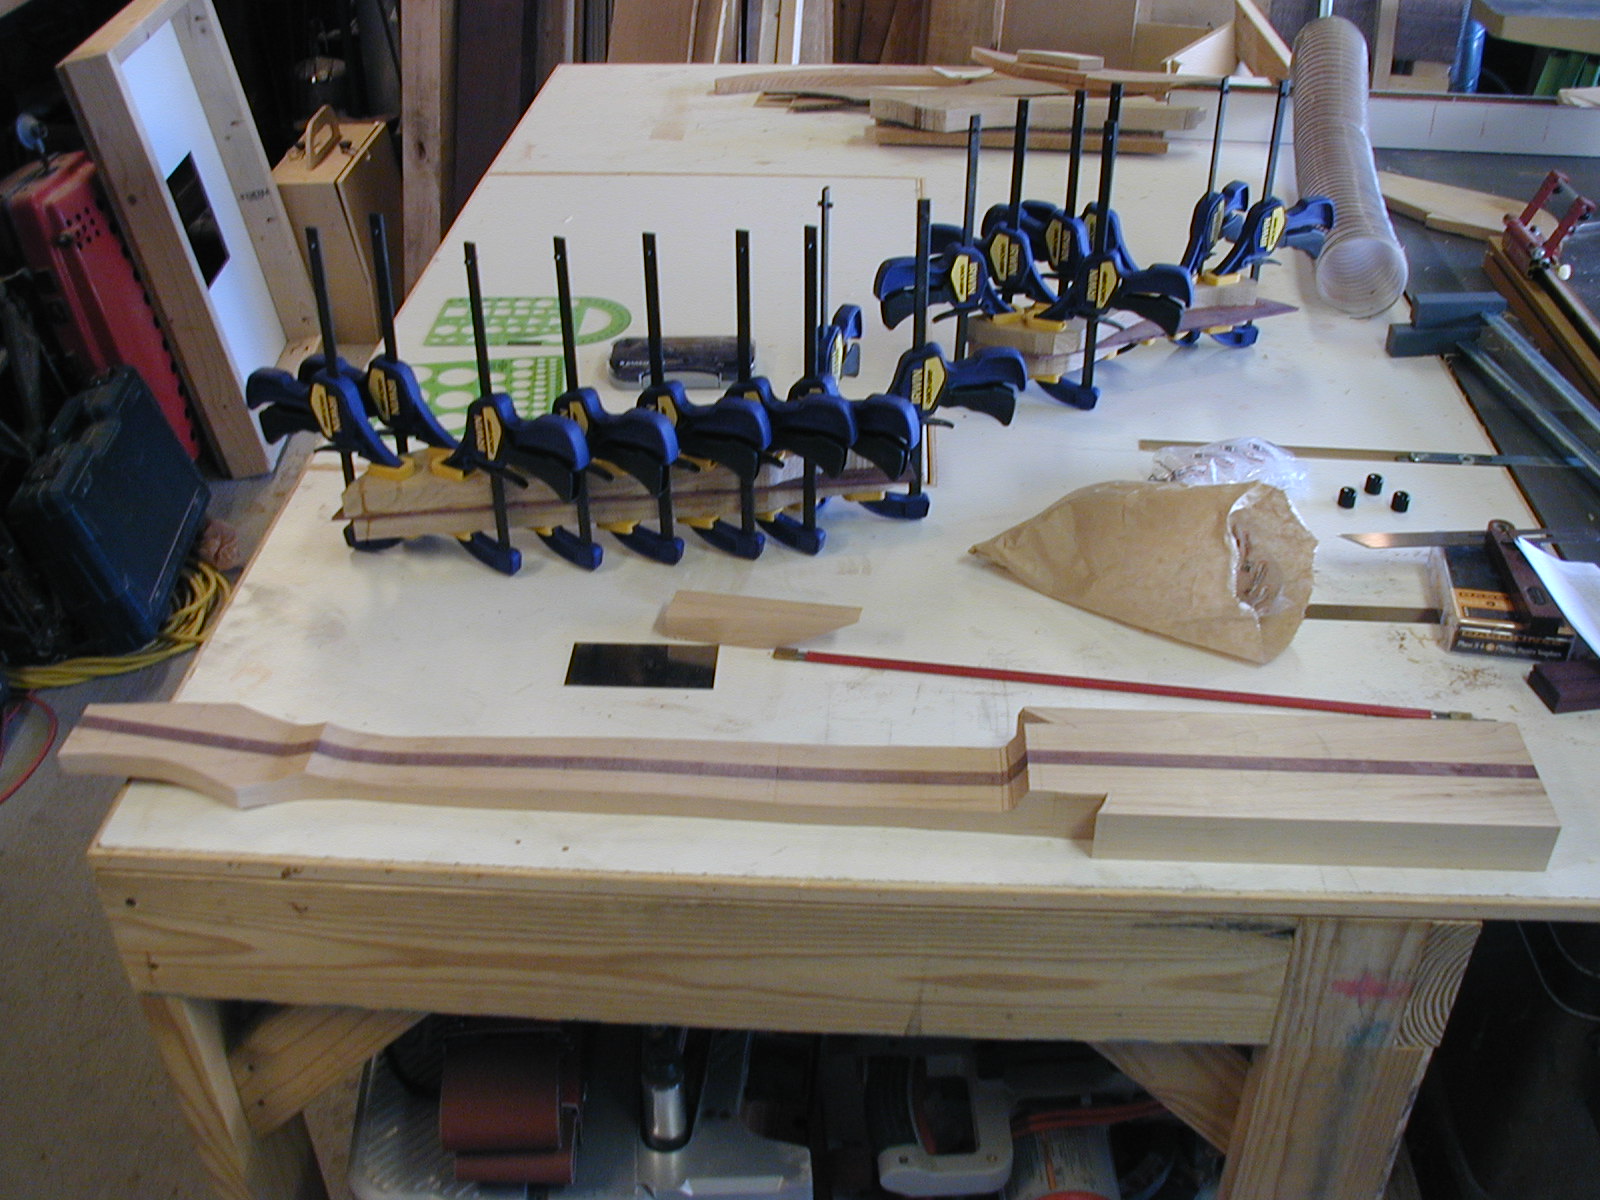
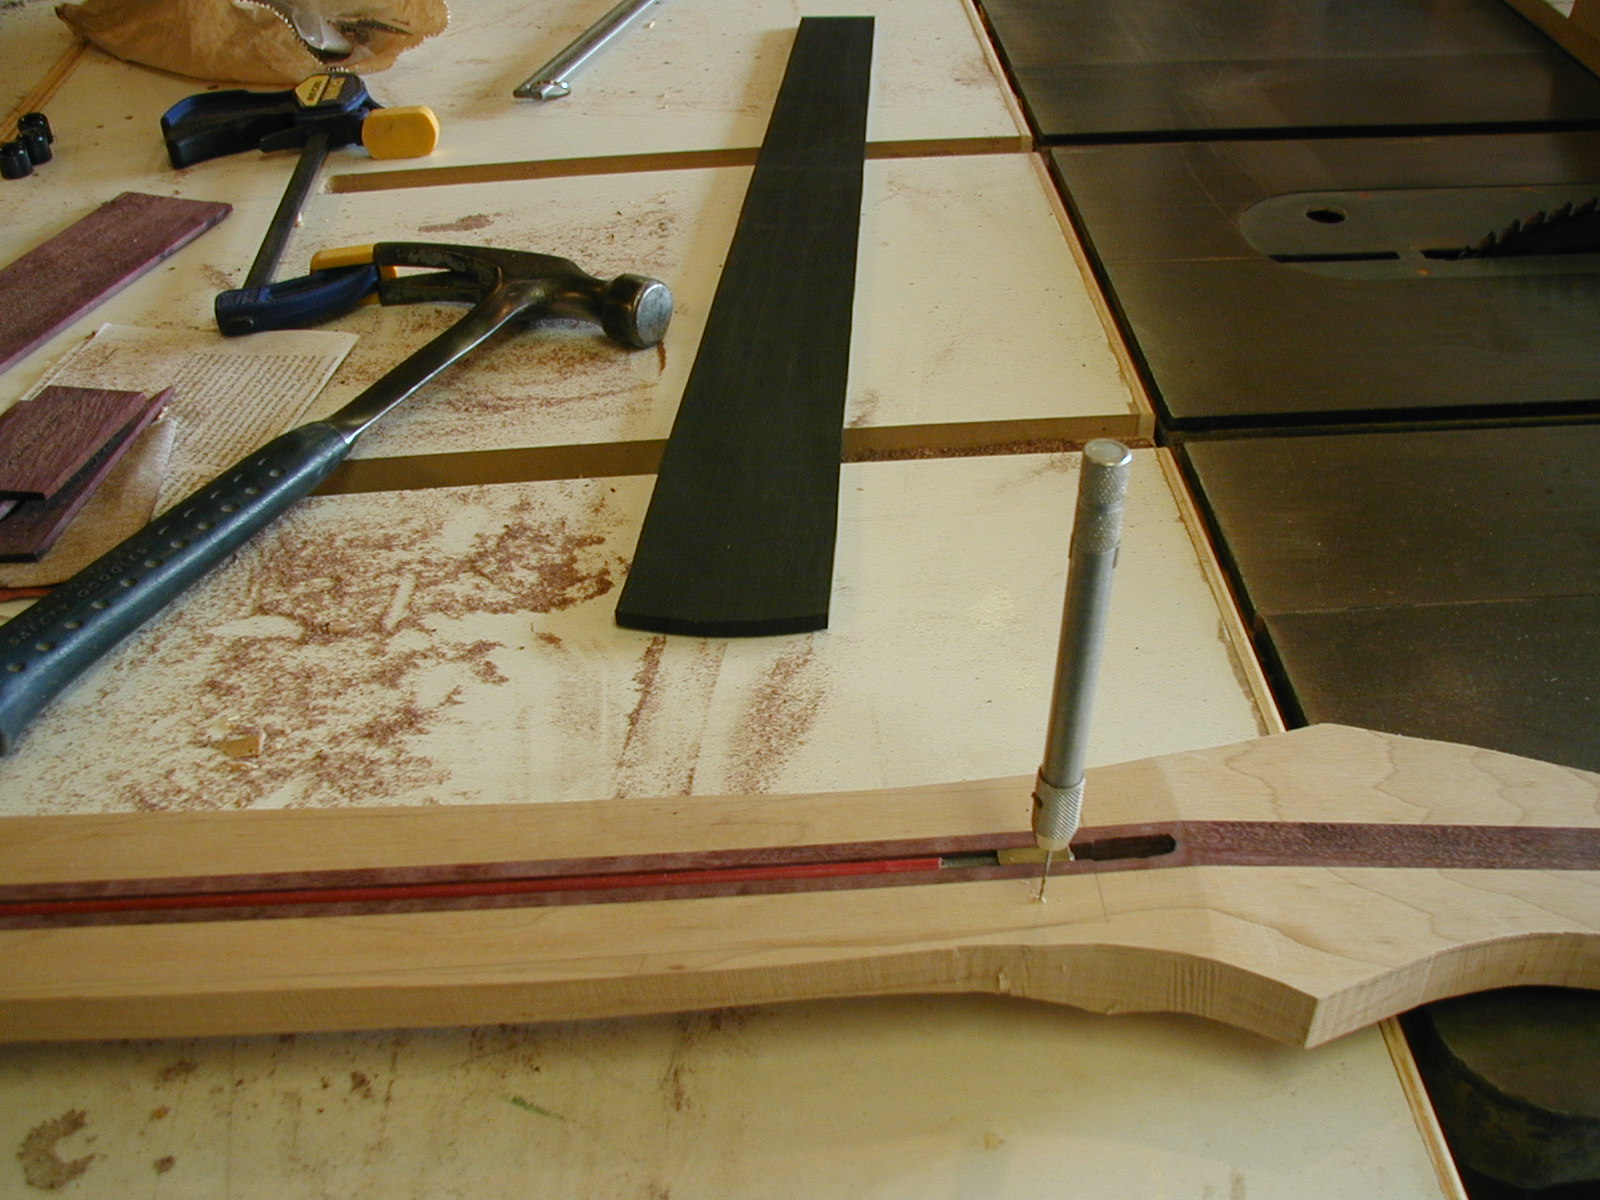
I wanted to try fretless bass, but didn't want to splash out for one on a whim. So I built a template and practiced on that to see if my fingers could handle the lack of guardrails. When that worked ok, I bought a very cheap electric upright which I remade into a more recognizable Fender bass style. That worked ok too, so it was off to the races. Research showed that hard maple is preferred for necks and I wanted the security of a through-neck design. Not knowing what the wood might do, I opted for a double acting truss rod. Since nothing I read said that the bouts had much to do with tone either way, I opted for white oak laminated with purpleheart for aesthetic purposes.

Here's where the work really gets going. The glue lines were jointed, and the stock planed for consistent thickness. Rather than shape ahead of time, I just made a giant block.

Have to get this part pretty close to right -- This is the slot for the truss rod.

Now on to rough shaping the neck on the bandsaw. New blade makes really clean, swift cuts.

Resawing thin pieces of purpleheart to put between the neck and the bouts.

...and making the thickness consistent for good glue-up.

Here's the piece selected for the bouts. I really like quartersawn white oak. :-)

Getting the bouts laid up, with a lamination of purpleheart for esthetics and function.

It actually took a few more clamps, but here's a good look at what it takes to clamp up odd shapes. :-)

Installing close clipped pins to keep the fretboard still during glue-up. Seems odd to think of glue as slippery, but until it sets it's pretty frictionless.

It's hard to get too many clamps on something. :-)

Need to be sure the sides are pretty straight, the eye will see this pretty clearly when the strings are on, plus it will feel right if it *is* right.

Now to get the curve on the neck right. Decided to do this by feel, it was interesting. You get a lot of control, with a lot of responsibility. It has to be straight, smooth and even, with a comfortable curvature so that your thumb supports the neck comnfortably and firmly, and there is enough material to oppose string tension. Fretboards pop off if you overstress them!

Figuring out where to cut all the holes in the body. Scary stuff!

For these cavities, wasting out with a Forstner bit makes the most sense.

Then they are easily squared up with a good, sharp chisel.

The mockup was all kinds of handy here. I used it to see if my fingers knew where to land before ever starting, shaped it to see if the look was right over a few days before cutting up the wood, and laid out the major features to check for disastrous overlap or impossibilities.

Using a sharp awl through the paper tracing allowed me to connect-the-dots with a striking knife before routing the cavities.

I took a deep breath and eyeballed this. Marked the upper surface and side to make sure it was going roughly where it needed to.

Seems to have worked out pretty close. Luck is aways welcome in the shop. :-)

Shorter hole was harder to get right, go figure.

Got some blowout when drilling for these, so decided to go for a little lemonade. There was some leftover ebony, so I trimmed it to about 3/4" and made these little diamonds. Took them over to the spindle sander and gave a curve to two opposing sides for a bit of movement. Hope it doesn't read as too much detail when it's all together.

Wish I was better at inlay, but this turned out ok.

Got some blowout here too, so here we go again. I used a striking knife to outline the inlays, then used a very small router bit to waste out a level-bottomed cavity. On this one, the handscrew provided a flat base for the router.

So now to figure out how to drill through the ebony inlays without any blowout. I levelled the inlays, put a layer of blue tape over them, and held *very* firmly while drilling with very little pressure. It worked!

Same as the rest of the project, started with a hunk of raw material for the nut. Ok, well, I didn't actually build the pickups, bridge or tuners, but you get the idea.

I don't seem to have any pictures of the marker dots that are in the edge of the fingerboard, but I drilled some of them in the wrong places and covered up the mistake with handmade dowels and epoxy impregnated with ebony sawdust. Black sawdust is weird, let me tell you.

Here's what it looks like with all the parts put together, except the strings. Starting to want to play!

Here's the first coat of Boiled Linseed Oil. Plan to give it all the oil it wants and then paste wax for a durable, repairable finish. The grain already looks really nice under the oil, all the way around.

Here's a look at the body. You can really see the ray flake in the white oak bouts.

Back of the headstock showing the tuners and the volute between the neck and headstock.

Over-flashed view of the front of the headstock showing how the tuners relate to the inlays. It turned out fairly well. You can also see the little shark tooth cover for the truss rod, more ebony. ;-)

Here's the back all finished and nice. I like the through neck for a clean transition to the body. The woodworker in me wants to avoid mechanical fasteners whenever possible. Also, this shows the electronics cavity cover, still more ebony! The piece left over from the bottom of the fingerboard was just big enough to cover the cavity, so that decided the question of what to use.

Here's a relatively clean view of the finished bass, sitting ready to play. Even with a much smaller body than usual this thing is heavy, due to the amount and types of hardwoods: Hard Maple, White Oak, Purpleheart and Ebony. I've had good luck with Dunlop StrapLocks so they're used here as well, and a Comfort Strapp makes it possible to wear for long enough to play whole sets or even entire shows if necessary. :-)

Helpful links